Put simply, walking is a series of forward falls. Keep falling forward, one foot after the other (without falling on your face, of course), and you’ll move along in a straight line. Simple. Learned to do it as a toddler. Do it every day. So what’s with this treatise on technique?
 You’re not walking just for transportation; you have goals. And technique will help you reach them. Technique becomes vital the more efficiently you want to move, the more quickly you want to go, the more you want to get fit by increasing intensity, and the more you want to avoid strains and pains.
Turning walking into a fitness activity demands a new dimension. Taking stock of how you move and smoothing that movement with the technique tips that follow turns your daily stride into a powerful, fitness-producing, calorie- burning strut. You may even be tempted to apply it to your strolls up and down the grocery aisles. However, this is only a primer on technique.
Before you start overanalyzing your fingers, toes, knees, and nose, let’s get basic and think back to when you were little and your mom nagged you to stand up straight. She was right; no matter how fast or how far you go, standing tall is key. Hunching your shoulders tightens the chest and inhibits breathing. Dropping your chin to your chest does the same by closing off your throat. Instead, tighten your abdominal muscles, trying to bring them toward your back. Relax your shoulders and pull backward and then slightly downward with your shoulder blades. Avoid arching your back; this could strain your low back. One more thing: Keep breathing, please. Be careful though; walking should be simple. If you focus too intensely, you’ll end up walking and looking like Frankenstein. Do the best you can, and if you don’t get one point of technique, forget about it and try again later.
Bottom Half
Normally, the saying goes, “Take it from the top,” but not when it comes to walking. Your bottom half is more important. So, maestro, let’s take it from the bottom. Large major muscles in your lower body power you along. Take advantage of that strength, from hips to heels.
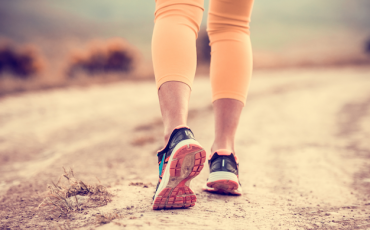
- Heel to toe. Compared to runners, who normally land more on the middle part of their feet—or even on their forefeet if moving faster or up or down hills—walkers should hit squarely on the heels with toes lifted high. That allows your ankle to move through its complete range of motion, from the heel landing in front of you at the beginning of the stride to the big toe pushing off behind you at the end of it. The toes and foot of the leg behind you at the end of the stride offer major propulsion as you pick up speed. Think about trying to leave your heel on the ground behind you a split second longer than normal, and feel as if you’re trying to push the ground away from you with the ball of your foot before your foot leaves the ground to let the leg swing forward.
Here’s a simple way to experience the correct motion: Sit in a chair and straighten your knee so that your foot is off the ground. Now flex your foot and lift the toes toward you (this is the heel plant part of the roll through), then slowly move your foot into a pointed position (this is the toe push-off part of the roll through). If you aren’t used to this repetitive action while walking, you may feel a burning or tension in your shins. Don’t worry. That’s only an underused lower-leg muscle complaining, and it will get stronger as you walk more.
- Stride. Overstriding can turn your walk into a bouncing gallop reminiscent of Groucho Marx’s comedy gait, which wastes energy that could be propelling you forward. Avoid the natural tendency to take longer strides to go faster, which is part of what runners do. Walkers, on the other hand, need to move their feet more quickly by taking more steps per minute—turnover, as it’s called—while maintaining a natural stride length. Proper stride length prevents strains. Common complaints from overstriding include pain in the arch, knee, hip, and heel.
When walking at a slower pace of 17 or 18 minutes per mile, you might take 115 to 120 steps per minute, while a typical brisk walk at 15-minute-mile pace might generate 135 steps per minute. A speedy 12-minute mile might mean 160 steps per minute. The number of times you turn over your feet per minute increases as your walking speed increases. This means you’ll feel smooth, like you’re gliding. On the other hand, don’t overexaggerate and turn your stride into short, choppy steps that diminish your natural power.
- Hips. Feel as if your leg starts at your waist. With each step, extend the leg slightly from above the hip bone. That frees your pelvis to rotate forward with each leg so you can cover more ground without bouncing. Avoid excessive side-to-side motion, which keeps your center of gravity from moving forward, which is of course the direction you want to go. Swinging the hips side to side also wastes energy; you want your energy to travel forward. Just relax in your hips and low back and let your body do what comes naturally. Tightening in your hips and back can also create back strain.
Top Half
Now that you understand the technique for your bottom half, it’s time to move to the top. Your posture should be tall and erect no matter what your walking speed or level. Keep your chin tucked in, your ears over your shoulders, your eyes cast about 10 feet in front of you, your shoulders relaxed and pulled back, and your abdominals tightened. Dropping your chin or letting it protrude could produce tightness and strain in the back of your neck and upper back. Proper technique for your top half is important at any pace, but becomes even more so as you move faster.
- Elbow bend. Are you a bit intimidated or embarrassed by the idea of bend- ing your elbows in right angles and pumping away like those way-too-serious- looking walkers you see on the streets? Don’t be. This arm position serves two useful purposes. First, as you try to increase speed you’ll find you can’t swing the long lever of an extended arm as quickly as you can a shorter lever. And it feels awkward and may actually hurt to pump your arms while they’re straight. Straight arms will keep you from achieving your speed potential. Who wants to be limited by an arm for goodness sake? Second, if your hands swell, bending your elbows helps keep blood and fluids from being pulled into your hands by gravity.
- Arm swing. Whether your arms are straight or bent, the pendulum action should happen at your shoulder. If you use a bent arm, the angle of your elbow joint shouldn’t change during the swing. This puts extra strain on the ligaments and muscles and, again, wastes energy.
Also, control the bent-arm swing. It should be strong but remain close to your body. During the front portion of the movement, swing the hands no higher than the chest, tuck the elbows in at the waist, and don’t allow the fingertips to cross the midline of your body or reach in front of you more than 10 to 12 inches. At the back portion of the movement, the elbow remains in its bent position. Power your arm swing with your back muscles, not your small shoulder-joint muscles. An added bonus is that the more you engage the back muscles in the arm swing, the more you’ll tone them. Try to swing your arms faster, and your legs will likely mimic the speed.
- Hands. There’s no need to clench your fist, unless you have a walking companion you want to punch out! Imagine you’re holding a fragile raw egg in each cupped palm. Squeeze too hard and you’ll break it; open too far and you’ll drop it. Clenching can also cause pain in the forearm and wrist.
Technique Summary
Use this cheat sheet to remind yourself of the key points in good walking technique:
- Stand tall, with your shoulders back and chest open.
- As you step forward, lift your toes and plant the heel of your lead foot.
- Roll through the entire foot and push off with your toes, lifting your heel high.
- Avoid overstriding and bouncing.
- Bend your elbows in a right angle so you can swing your arms faster.
- Swing your arms from the shoulder and keep your elbows close to your sides.
- Avoid clenching your hands.

Leave a Reply