No fitness program can be considered well rounded without exercises to increase muscle strength. Because of the vigorous arm swing, walking tones upper-body muscles more than running (good distance-running form demands that participants carry their arms more passively, which achieves little if any muscle conditioning). Walking’s arm movement and upper-back engagement isn’t enough, though, to keep bones healthy and muscles strong for the rest of life’s demands.
As you fine-tune your overall fitness program, try to find time for two muscle- toning sessions a week, as recommended by the American College of Sports Medicine (ACSM). Target large muscle groups from head to toe. Exercise 8 to 10 muscle groups, twice a week, performing 8 to 12 repetitions of each. Such a toning routine doesn’t require more than 20 to 30 minutes, although you can always do more if you want. Remember, exercises to strengthen muscles need not be complicated or expensive.
Weight Machines
 Often called selectorized machines because you select a weight by moving a pin in a stack of weight blocks, these are the machines you normally see at clubs. In a club, one machine is usually used for one exercise, such as a hamstring curl. For home use, you’ll find units that combine an entire range of exercises on one compact station that can, depending on the design, use any combination of seats, pins, pulleys, stacks, bars, or cables. One stack means it’s available for one user at a time, while two-stack home gyms can be used by two people at once. Since the mid- to late-1990s, home gyms have become very advanced and can be a great investment that offers about all you need, especially if you can’t, won’t, or don’t want to go to a local club.
Free Weights
Rather than stacks of weight attached to cables or pins, free weights are dumbbells and barbells, which are bars on which you slide plates of weight on the ends to create the weight you need to lift, push, or pull. The beauty of free weights is their adaptability; add a simple bench—one that can decline or incline or has a bar and stand for bench presses—and you can do just about anything. The only catch is, you have to know what to do and how to do it. If you don’t, your workouts won’t achieve what you want them to, or worse, you might hurt yourself. And you always run the risk of becoming frustrated and quitting. Free weights are best if you have experience or knowledge or will read a book to learn an appropriate program and proper technique. You can also hire a personal trainer for a couple of sessions who can help set up a program for you.
Rubber Resistance and Body Weight
Weight machines and free weights are great for building strength and toning, but if your goal is basic conditioning, there are cheaper and simpler options. You can also use rubber resistance tubes and bands, work against your own body weight, or invest in a stability ball or balance board. You can do abdominal exercises and push-ups on your living room floor, and pulling on inexpensive rubber surgical tubing or bands is a fine substitute for using a weight machine to condition muscles in the back, chest, arms, legs, and feet. Those large, inflated stability balls usually come with enough illustrated instruction to get you started on basic overall exercises and stretches. And balance boards can strengthen and condition your lower legs and abdominals even more. None of this equipment costs much and they are compact (well, other than the ball); just stick them in a drawer or under your bed. The ball, by the way, is a great office or TV-watching chair that can help you sit up straight and use your abs while just sitting there!
Walking-Specific Exercises
Proper strengthening should balance the strength between muscle groups as well as target areas that may be susceptible for tightness or that need extra strength for a particular activity. For example, if you strengthen the quadriceps, don’t forget the hamstrings; if you work the chest, be sure to also work your back. If your low back tends to tire or ache, focus on your abs as well as your back, but first consult with your doctor. Be aware that walking uses the shins and calves, so be sure to work these areas.
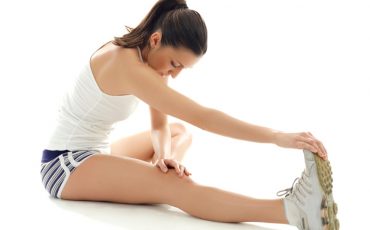
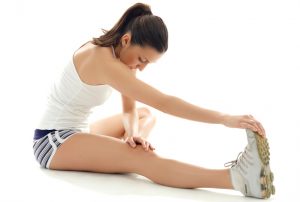
Certainly a well-rounded strengthening and toning program is best and allows you to hit all parts of your body. The following basic selection of exercises provides a whole-body approach to major muscle groups. But don’t be con- strained by this list. It’s just a start. There are hundreds of different exercises and a thousand different ways to do them. This group focuses on those you can do at home without extensive or expensive machines or equipment. One key for all exercises is to avoid holding your breath during the movement. Don’t laugh. You’d be amazed how many people take a final gulp and hold it as if they’re going underwater. Breathe!
A health club trainer will help you develop a larger repertoire of exercises. Meanwhile, these will get you started.
Overall Upper Body (Push-Ups)
Many people have bad memories of gym classes and presidential tests, but this is an easy overall upper-body toner and strengthener. And, compared to gym class where you got yelled at if you stopped, you can actually do short sets and rest.
Lie on the floor, facedown. Place your hands under your shoulders. You can either lift your body by straightening your elbows but leaving your knees on the ground, or place your toes on the ground and lift your
body into the air into a straight boardlike position. Whichever you choose, keep your abdominals tight, don’t let your back sag or sway, and keep your head and neck aligned with your back rather than letting it drop toward the ground. Next, lower your chest toward the ground while bending your elbows, and then lift yourself back up to a straight-arm position. Repeat as many times as you can before your position and technique disintegrate. Rest. Repeat.
Abdominals I (Crunches)
Lie on the ground flat on your back. Bend your knees so that your feet are flat on the floor. Either cross your arms over your chest or rest your head in your hands, using your hands only to support the head. Do not yank on your head. Lift your torso and imagine shortening the distance between the bottom of your ribs and the top of your hips. Keep your head back, eyes on the ceiling and elbows open. Think about pulling your belly button into the floor and exhaling as you lift. Keep your abs from bulging outward by emphasizing the contraction during the entire lift. Lower slowly.
Abdominals II (Sides)
This works the muscles in your sides called oblique’s that help to support your back, tighten your waist, and hold in the abdominal muscles in the front. Lie on the ground flat on your back. Bend your knees so that your feet are flat on the floor. Put your hands behind your head, resting your head in your hands. Lift your torso up, turn toward one side, aiming your arm pit at the opposite knee and keeping the elbow back, then return to the straight position, and lower slowly. Again, exhale as you lift and inhale as you lower. Keep your abs from bulging outward by concentrating on the contraction during the entire lift. Repeat on the other side.
Upper Back
Strengthening your upper- and middle-back muscles will help you stand tall and make your arm swing stronger, too. To work your upper back, hold a long and wide elastic band, such as a Dynaband or Thera-Band, or rubber tubing, with one end in each hand. Keep the band taut. Raise your arms over your head (pretend you’re forming a Y), but keep your shoulders down and relaxed. Pull down and slightly outward, with your elbows lowering toward the ground and the band moving behind your head. Focus on your upper-back muscles. Raise slowly to the overhead start position. Repeat 10 to 12 times.
Middle Back
Sit down on a chair or on the floor. Loop an elastic band around the back of an object in front of you. You can also tie the band to a door handle, forming two tails to grab that are a couple of feet long. Grab each end with your arms extended and your hands directly in front of your chest. Try this with the palms facing down and with the palms facing in. Pull back on the band so that your elbows reach behind you, and focus on squeezing and working the muscles in the middle of your back and shoulder blades. Slowly return your hands to the start position. Repeat 8 to 12 times.
Low Back
Lie facedown on the floor with your hands under your shoulders, as if you were get- ting ready to do a push-up. Slowly lift your chest and shoulders off the floor, keeping your chin down (don’t yank your head back or touch it to your chest). Keep your abdominal muscles tight, and only extend as far as is comfortable without straining or pushing hard with your hands. Hold and breathe for 10 to 20 seconds. Exhale and release slowly to the ground. Release your arms to your side and relax for a minute. Repeat two to five times.
Lunges
Stand with both feet together, giving yourself at least 4 feet of open space in front of you. Keep your abdominals tight, shoulders back, and spine aligned. Carefully step forward 3 to 4 feet with one foot. When that foot touches down, continue bending that knee into a slight lunge. Keep knee aligned over the foot rather than going past the toes. Your back knee will bend slightly and the heel will come up off the ground. Hold for a split second, then use your leg and foot to push you back into the starting position. Repeat 8 to 10 times. Repeat with the other leg. You can also hold hand weights. If you have knee problems or pain, avoid lunges or don’t bend the knee deeply enough to cause pain.
Hamstrings
The hamstrings in the back of the upper leg also get a strong workout in walking. Stand facing a chair or other support with a circular rubber band or tube looped around your left ankle. Stand on the other end of the tube with your right foot, bending the knee slightly. Keeping your back straight and abdominals tight, lift your left until you feel the muscles in the back of your leg being used. Lower the foot just a little until the muscle relaxes, then pull the heel upward again. Work up to 10 to 12 repetitions with each leg.
Shins
The shins (the muscles in the front of your lower leg) get a particularly strong workout during walking because they’re responsible for repetitively lifting the toe. When you first start walking, you might feel burning or extra fatigue in the shins. If you ice them before and after walks and stretch and strengthen them, these sensations will go away. Meanwhile, do a few strengtheners.
Attach a circular elastic band to the leg of a chair or table. Sit on the ground facing the band with your legs nearly straight. Hook the toes of one foot inside the loop of the band. Keep the band taut while you flex your foot, bringing the toe toward you. Keeping the band taut, slowly point your foot away from you. Do 15 to 20 repetitions per foot. Do several repetitions in which you flex your foot, as above, but then move your toes to the outside or inside before you relax into the pointed position. Repeat on the other side.
Calves
Stand with your toes on a step or curb. You may want to stand next to something you can hold onto to help you keep your balance. Lower your heels very slowly and carefully, and only to the point of a slight stretch or feeling of tension. Keep your abdominals tight and your shoulders back, rise up on your toes and lower again. Repeat 10 to 20 times.
Feet and Toes
It’s amazing how important feet and toes are, yet how ignored they are. Try these towel scrunchers. Put a dishtowel or other thin cloth on the floor. Place your bare foot on top of the cloth and curl your toes while trying to grab the towel and move it or bunch it up. Do this for 15 seconds to a minute with each foot, building gradually.
The wide rubber bands and tubes I mention are available in fitness specialty stores or other sporting good stores and usually come in various colors that represent different resistances. They often come in variety packs. The loops used for your feet are narrower, thicker, and made of tougher rubber, but if you can’t find premade loops, use a high-resistance band and tie it into a loop. Check rubberized gear each time you use it to make sure there are no weak spots, cracks, or tears that could cause the band to break and snap in your face. Storing your bands out of the sun or heat will help them last longer.
Leave a Reply